Wednesday, 26 January 2022

Independent Research 2 - How to make fake wounds?

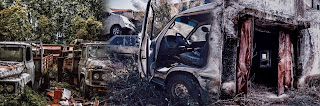
For my second research, I decided to find out how to do special effect of wounds. As our protagonist is surviving in a abandon junkyard, she will definitely get hurt, such as scrapes or cuts. We can do some fake wounds in the makeup to make the audience feel more realistic. Through these wounds, the atmosphere of danger and terror was embodied from the very beginning. The visual effect is very important.

This is the first video I watched and the process of the method in her video:

-       Put gum on face

-       Tap the area to make it tacky

-       Scar wax, in shape, put on the gum

-       Use spatula to blended the edges of the scar wax into the skin

-       Powder, foundation to make the scar wax the same colour as the skin

-       PPI palette, make the irritation around the wound

-       Made a slit through the scar wax

-       Add colours by using PPI palette – red, brown in the middle, add some purple blue beside the wound to make it more real

-       Put the stage blood in the slit, don’t be neat

Her method is very professional, but because I don’t have the scar wax for now. I searched some other easier ways to do the similar wounds. In this video, she introduces three ways which include how to do cuts and burn wound. So she uses latex instead of the scar wax. To create the 3D texture, she combine the latex with cotton and tissue paper. For the cuts, she use a spatula to make a slit in the middle and add the dark red tone colours. Similar for the burn wounds, after the latex is dry, she make holes on the layers of latex. Then she texturise by deepen up the holes use brown.


From both videos, I understand that the key rules are the texture of the wound. We can add the texture by using the scar wax or using latex with tissue paper and cotton. If the wound is three-dimensional, it will be more realistic. We can use the spatula cause it is more controllable and can add the texture. Also, it don’t need to be very neat otherwise it will look fake. Drawing the colours is very important too. The wounds are all in red tone. Older wounds will become darker, you can use red and then add brown in the middle to highlight the layers; newer wounds will be brighter and you can use bright red. So base on my research, I practiced two different type of wounds.


This simple experiment was relatively successful. I realised that because of the shooting time  isn’t very long, so the makeup time should not be too long, it must be painted quickly. In the process of experimenting, I found that using latex can make the skin feel tight and there may be some residue when removing makeup. In the next time we can use vaseline as a primer first, which should be much better.

Independent Research 1 - Handheld Camera Movements

In our opening sequence, there will be an action scene (running scene), so it is important that we know how to use the handheld camera movement correctly. In addition, I also researched into how to do a shaky camera movement as we might need to use it to create more impact and tension during the chasing scene.


How to make the running scene more intense and effective in handheld camera movement?


1. 
When doing the handheld shoot, don’t do extra camera shake we can just lock in on the actor. We can try to follow the person’s movements and try to get a stable shot, it will move in a natural way still. If the camera moves shakes too much, it will make too distracting. When the camera moves as the actor’s movement, it allows the audience to be more immersed in her situation and emotions which will create a better impact.


2.  
When shooting the running scene, we can use camera movements to control the speed. For example, we can include lots of foreground objects such as trees or cars. They can swipe across the camera quickly, giving the viewer the illusion that she's running faster. Because running very fast in several times will be painful and also a very high speed is not very safety. In addition, another way to make the actor running faster is to control her position in the frame. So we can put the actor in one side of the frame and while she is running, we can slowly adjust the framing to another side. This simple movement can make the audience feel that the actor is running faster and faster that the camera can’t keep up with the action. We can also use this method to show that the bad guy is about to catch up with the girl. The camera follows the actor from behind and by the time she is keep running, make the camera closer to her. This creates more pressure and tension. 


3.  
Change the focal length of lens while shooting. When we zoom in or shoot really close to the actor, it gives the audience more pressure and can show more emotion. Moreover, if we cut a long focal length to a short focal length, it gives an impact that the actor is moving closer to them.


4.  
Change the shutter speed. Because we are filming an action scene, we need to make the fast movements clearer and more realistic. We can do it by changing a faster shutter speed. This can create more intense atmosphere for the audience.


5.  
The last method is to make the shot closer after each cut. So for example, we can shot the wide shot first and then mid shot and cut to close up. This simple trick can build the tension of scared and nervous.

 How to do shaky camera movement correctly?

    The shaky camera technique can condensed effect of the movements, it is really effective and creates a sense of instability. However, if we do the shaky camera all over the action scene, it will becomes very poor standard as it can’t show clear what has happened and it will make the audience confused. The most important rule is to combine a stable tracking shot and the shaky shot. The contrast between the two movements can create tension.

In the ’28 weeks later’, they use a stable tracking shot for the protagonist but a shaky shot for the zombies which emphasise the dangerous atmosphere and shows how crazy and fast the zombies are. For our opening sequence, we can start with a tracking shot of the girl but as the motorcycle gets louder and closer, the girl's movements may become more jittery and nervous. Here we can use a little shaky camera movement to increase the audience's sense of fear and tension. But we must remember to use the shaky camera sparingly.

Monday, 24 January 2022

Moodboard


I created a mood board to make this idea more visual. The red and dark tone clearly highlight the genre of the film - horror. The motorcycle, car, and the big weapon give it an action concept. In addition, since it is a title sequence, I looked for suitable fonts that convey an impression of violence and horror.


On the mood board, there are two different settings. One is a scene outside that looks abandoned, and there are lots of old cars in the scene. The other is an indoor setting which is like a dilapidated building.


The mood board illustrates a fierce man and a terrified girl. From the photos of both eyes, we can tell that the girl is the victim, and that man is bad.


From these pictures, we can know some key information about the man. It is clear from the pictures that he is chasing the girl with a motorcycle and he has weapons. He wants to murder her in this abandoned place. Also, from the pictures where he is standing by the door, it indicates that the man might find the girl there.


The girl's picture shows that she is running and escaping. The picture of a girl sitting on the steps and covered her ears indicates that she is hiding in the building at the end. It is obvious that she is in a dangerous situation. Although there isn't a dead body in the picture, you can tell from the blood on the window and the battleaxe that she might have been injured by him.


Additionally, I included some key elements in the mood board. For example, the 'no signal' sign gives an unsafe feeling. And a hand in the car could indicate that there might be a scene in which the girl is in a car.


This mood board conveys a scary and horror atmosphere. It contains key information about the opening sequence from all the details in the pictures.


Developed idea

Some new developments we added to our final idea as a group, involved changing the very beginning and end to make it more interesting and substantial;
The original beginning followed the girl simply scavenging for resources at a junkyard, but we decided that she should instead be attempting to hotwire an abandoned car at that junkyard, then she would check her phone for signal from inside the car rather than walking around the abandoned town as it could be difficult to find a good location for that specific shot.
The original ending showed the girl going to step back outside the shack, only to be jumpscared by the killer at the door reaching out to grab her - we changed it so that, whilst the girl leans back against the door in relief, she slides down to sit against it to catch her breath before a (fake) weapon -a battleaxe for now- suddenly crashes into the shot next to her as she jumps back and screams. We then see the killer as he forcefully pulls the axe back out of the ground and gets ready to swing it back around to kill her, the sequence would then end on a shot of the room from outside the door, we continue to hear her screaming as blood splatters against the floor of the doorway.


FULL BREAKDOWN:

  • Girl is scavenging around Junkyard
  • She comes across a car and opens the door before crawling in
  • She starts trying to hotwire the car (more detail after independent research task)
  • It fails to start so she sighs in defeat and sits down in the front seat
  • She takes out her phone and checks for any signal
  • We gradually hear a very quiet buzzing sound from the distance
  • the sound grows louder and louder to eventually reveal it as the revving of a motorcycle
  • She gets an intense look of pure horror on her face and sits fully paralysed for a few seconds 
  • Just as the revving suddenly gets significantly closer, she gets it together and throws herself out of the car 
  • She sprints as fast as she possibly can to a run-down looking shack
  • She jumps inside and slams the door shut 
  • She quickly crouches down with her back against the door, her hands pressed against her ears and her eyes shut tight
  • The sounds of the motorcycle quickly approach the shack 
  • The sounds slow in pace as they reach the doorway from the outside 
  • The motorcycle starts to circle around the shack
  • The girl jolts from shock and follows the sound with her head as it passes by every wall
  • The sound then suddenly drowns out and somewhat disappears
  • She sits completely shivering for a few seconds and cautiously takes her hands off her ears
  • She quietly lifts herself up and turns around to creak the door open
  • She peeks outside and scans her surroundings before fully opening the door to reveal an empty scene
  • She steps back inside and leans against the wall, sliding down to sit against it, she sighs in relief
  • All of a sudden a battleaxe crashes into the shot right beside her 
  • She jumps back and screams
  • The killer then pulls the axe back out of the ground and holds it above his shoulder, ready to swing it back around to kill her
  • We then look in from outside the open door, we hear her screaming as blood splatters onto the floor of the doorway

Friday, 21 January 2022

Feedbacks from group pitch

A great piece of advice we were given for deciding on an idea was to just think about which one we would have the most fun filming; this somewhat ruled out the Meeting the Parents idea as the fun would mainly come from the final product, and whilst the Ghost Story would have been very exciting to set up and film in a dark flashing classroom - the Motorcycle Hunter sequence would ultimately be the most fun to develop and film even from the creative freedom of the set itself.

Group Pitch 1 - Meeting the Parents Sequence


The main issue we were told this sequence would bring was its reliance on acting - the tension is mostly built from the extreme suppressed anxiety the main character expresses, so if we were unable to find an actor who could act out these kind of emotions to the extent that this idea requires, the effect we hoped to achieve would just not work and could come off as flat or awkward.


Group Pitch 2 - Ghost Story Sequence


The main problem with this idea is about the different culture setting. If the ghost speaks Japanese, it shows the story is in Japan which will be hard to explain in the short opening sequence. Also, it is difficult to build a Japanese classroom setting, e.g. the England plugs. Also difficult to find a suitable Japanese-speaking voice actor who feels ghostly. Moreover, there might be an issue in finding Chinese students who can act Japanese.

So there are many problems we need to solve and we need to develop it more, it is a challenge choice.


Group Pitch 3 - Motorcycle Hunter Sequence:


Include a post-apocalyptic environment, add more of a story for the girl e.g. is a survivor rather than just a random girl. Also don’t see the biker riding the bike just the sound effects, because it will cause safety issues if there is a real motorcycle moving in a high speed while shooting.


Wednesday, 19 January 2022

Camera Workshop 2

We did a second Camera Workshop on 18th January, we learned more about shooting and practiced.


We first discussed an important rule while filming during a conversation: the 180 degree rule. This means while filming two characters, the camera should stay on one side of the line between two characters which is about 180 degree. The camera can’t shoot from one side then cut to another side, this will confused the audience. So base on this rule, no matter what angle the lens is cut to, the people on the right will be in the right side of the screen and look left all the time, and the people on the left will always be in the left side of the screen and look right. This rule helps a lot when there is a conversation between two characters with masks, so people can distinguish them clearly.

Then we looked at a few typical camera compositions, among them the rules of three is very useful. It is to put people or your subjects in the left or right third of the camera. So when we filming, we can think of different camera compositions which helps to create good visual effects. 


While shooting a scene, we should always shoot the wide first, because we can block the scene and also we can get all the action in a wide first for safety in case there is some problems later on. Then, we can shoot the mid shot and the close up. When shooting the different angles, the actor need to do things repeatedly. We need to be careful of the continuity which means making sure that the movements, props, lighting all need to be the same in every shot. It is really important that they have consistent details which makes it more realistic. However, there are two movements are super hard to be consistent and repeat many times, which are eating scene and makeup scene. In order to help with the continuity, they will always give actors marks which shows the points that they need to walk in and out of a scene. So the actor hits their mark while filming which allows they stand in the same position every time we shoot.


When we practiced shooting, we need to say “Stand by” first, this is a signal to begin as this can make everyone stop what they are doing and be completely silent. Then the camera operator says “Camera rolling” and start to recording on camera. And the director says “Action”, so the acting begins. When the shooting ends, says “cut!” and stop recording.


We need to film before saying action and keep the camera rolling after the scene before saying cut. Because this can prevent some details from being missed, and it may be possible to capture some other material that can be used when editing later.


Last but not least, we shouldn’t watch the footage back on set because it would waste too much time if we had to look back every time. If we shoot it over and watch it again, we double the shooting time. Furthermore, if actors see their movements in the shot not looking good, they may end up paying extra attention the next time we shoot and it will become unnatural which will affecting the quality of the shot. So when we are shooting, when we feel that this shot is good, we started the next one.

Camera Workshop 1

Because we're going to be doing the production of the opening sequence of a movie ourselves, we need to learn how to shoot first. On January 17th we started our first Camera Workshop. We were shown a box that includes the camera, the lens, the battery, and a tripod beside them.

The camera we are using is Black magic 4K mini URSA. As the camera is really heavy and expensive, in order to prevent it from falling during the handover process, we have to say ‘yours’ when we give it to others, and correspondingly say ‘mine’ when we take the camera or other heavy equipments. 
The teacher also showed us how to use the tripod correctly. So first, we need to open the legs of the tripod. And we can twist the control pole up. Then, we can extend the height of the tripod by opening all three of the latches.We should open the bottom latches first, because it is easy to balance if we need to open the second layer of latches. When adjusting the height, our feet can step on the bottom to prevent it from being unbalanced. And before placing the camera on the top, we need to make sure it is balancing. While shooting, we should let the camera elevated to the same height as the object.
 
The first thing we need to check before shooting is the spirit level also called the bubble level. The spirit level can help us to determine the horizontal and vertical directions by moving the camera on the tripod to centering the bubble. Next we learned how to focus and zoom. This is done by twisting the ring to adjust the lens. The ring that close to us is to focus, and the ring furtherest away is to zoom.
We need to zoom in to focus and then zoom out every time because it can make sure the camera is focusing on the objects that we want.For example, if we want to focus the title of a magazine cover, we need to zoom in and adjust the camera to focus on the small detail. Then we zoom out to the whole scene. When filming a person, we normally focus on the eyes because it is the most detailed part on our face.
Moreover, we learned about the white balancing, it is used to change the colours which match the colour of the lighting in different settings. It can remove the unrealistic colours in the shoot. For example, if the camera is shooting outside (the sun), the light source will be very blue if the white balancing is for inside. And if we use the white balancing for outside while shooting inside (the man made lights), the scene will be orange. So we need to change the white balancing while shooting in different light sources. We can change it by pressing the WB sign on the touching screen.
 
At the end, we should striking the kit which is putting all the equipments away. First of all, we need to turn off the camera and remove the battery. Then we carefully remove the camera and put it in the box. Next, we need to twist the central pole off from the tripod. At last, we should open the latches and retract the legs to the lowest height and close the three legs together. The central pole and the tripod goes into the black bag.

Sunday, 16 January 2022

Feedbacks of the opening sequence ideas

After presenting two of the ideas - which are idea 1 and 3, I received feedbacks and made some changes.


IDEA 1

For the first idea, the storyline is quiet interesting especially the supernatural elements. But there are a few problems while shooting. First, the old television broadcast soundtrack might be difficult to record. Also, the time setting is at night which will be challenging for the lighting and shooting time. 


Base on these feedbacks, I made some changes for the idea. I originally envisioned three different scenes, but considering that shooting outdoors at night would be more difficult, I changed the scene where the main storyline takes place from an alley to the classroom.


The television elements are very interesting for the horror genre. So instead of making a soundtrack of the news, the television would be placed in the classrooms and would be constantly on and off. The light source of the TV is the only light in this scene. A extreme horror tension can be created with the continuous flashing of the light of the TV, and the terrifying sound effects.
Then can suddenly quiet down, and then sound good evening voice behind the protagonist. And the rest of the storyline keeps the same.


IDEA 3

In the third idea, most of them are achievable. The scene where the girl hide under the bed at the end is a typical thriller scene, and we can add special sound effects. It will create a more tense atmosphere. And also the ‘clicking’ sound of the password key instead of a lock gives a future feeling.

However, I will change the storyline from two days into one day. Because we are trying film production for the first time. A shot that expresses that this is the second day may confuse audiences if it is not edited and transitioned well. And also for a 2 or 3 minutes long opening sequence, it can’t be too complicated.
And from the feedbacks, I realised that we can’t tell the audience that the girl doesn’t have cigarettes through the screen. So I need change the way to tell audience that the girl find the strange living traces. 
Instead of showing that there are cigarettes in the flower plot, it can be seeing some cigarette ashes and a little spark on the flour. This can directly tell people that someone came in a while ago.


Friday, 7 January 2022

Concept idea for opening title sequence 1 - Horror


 The Script:

An old TV is broadcasting an urgent news-‘Recently, there have been many incidents in which people suddenly passed out and lost consciousness on the road at night. Please be vigilant and try to avoid going out at night.’

My friends and I walked out of the classroom, the sky was dark gray, like a scene with filters in a horror movie. The street lights on the road are already on. 


Suddenly a voice slowly comes to my ear - ‘ こんばんは (Good evening)’.  Very faint, but very clear. The sound seemed to be among us, but apart from me looking around for the source of the sound, no one seemed to hear it. 

I started to sweat. Is that clear sound really my illusion?


For some reasons, the alley has become extraordinarily dark today. The time passed by has also become extraordinarily long, as if there is no end. It seems that the street light was there ten minutes ago. The distance between us and the street light has not changed.


 こんばんは(Goodnight)


There was another voice behind us!  I am sure that I have no auditory hallucinations.  But... But other people still didn't respond. It seemed that in this quiet environment, someone suddenly said good night, not surprising, or maybe... They really can't hear?


"Eh", I wanted to call him by name, but I can't remember it suddenly.  ‘Did you hear that someone was speaking behind?’ He gave me a surprised look, and took a long time before he replied, ‘I didn’t hear it..’


I knew that I had no auditory hallucinations and wanted to check back, but suddenly I seemed to be stunned.


I can’t look back...


The movement of turning back is very simple, but at this moment, my neck seems to be very resistant to this simple movement, and my whole body becomes stiff.


Say Goodnight to me...

Goodnight that no one else can hear...


I turned my head vigorously.


Behind us stood a girl in a white dress who couldn't see her face.

The next second, I wore a white dress and stared at myself in the team.

Tuesday, 4 January 2022

Concept idea for opening title sequence 3 - Thriller


The rest of the film

There is a suspense at the end of the opening sequence. The follow-up story is about whether the girl escaped or was kidnapped by the guy and lived with him for a long time. We don't know if the girl is dead or alive in the end.

Our Final Sequence